
Are you in search of the right holder for your precious items? Or you are starting a business selling small items like candies, jewelry, gift cards, or backing goods.
custom tuck boxes wholesale can provide a comforting experience to your customers while keeping the products secure. They work to give customization and cut your expenses.
As Steve Jobs once said, “Design is not just what it looks like and feels like. Design is how it works”.
But is it easy to craft a tuck box? Surprisingly, it is straightforward, and you can do it for yourself. All you need is to follow this step-by-step guide on how to make a tuck box.
So, as you get into the workshop safely, let’s get started.
Gathering the Tools To Craft A perfect Tuck Box
Making your own tuck box is easy and affordable. To start, you need to get the right tools; these will help you to follow along. You can create the best tuck box designs with the least amount of tools and materials, including:
- Cardstock: heavy and thicker than regular printer paper but thinner than cardboard. Ideal for folding projects.
- Ruler
- Pencil
- Cutting tools like scissors, box cutters, craft knife
- Liquid glue, double-sided tape, or glue stick
Step-by-step Guide on How to Make Tuck Box
Now that you have all the materials in place. It is time to move towards the packaging. Creating a tuck box is more than just assembling the cardboard. You want a packaging solution that holds the style while not missing functionality.
Step 1: Right Tuck Box Dimensions
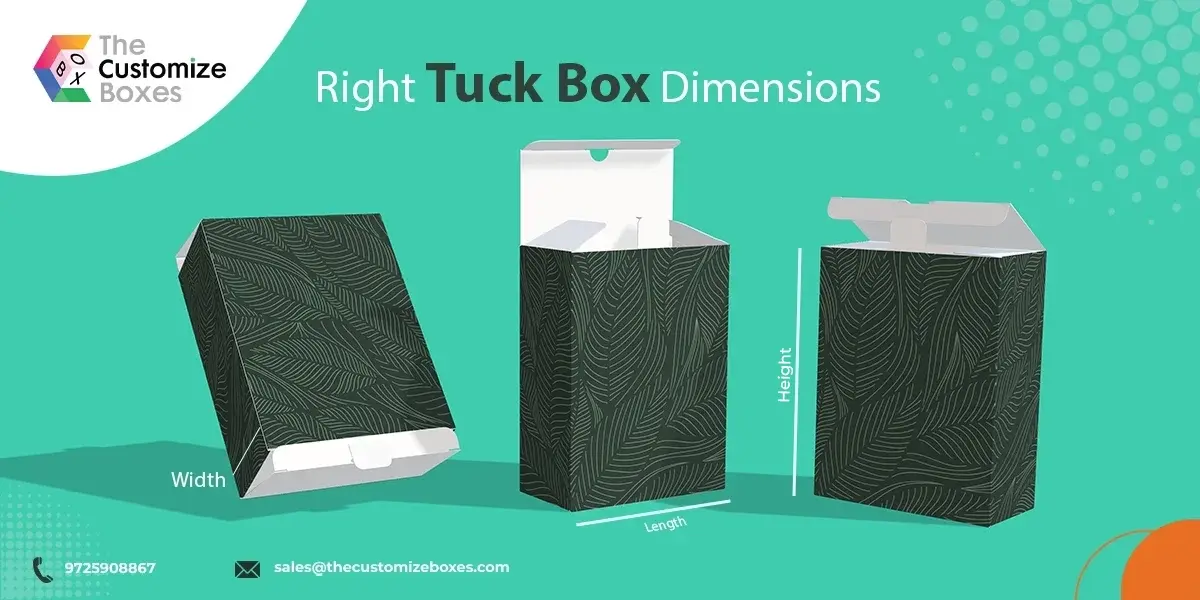
The correct dimensions are game changers to attain a snug fit and a polished appearance for your final boxes. At the same time, it may vary based on your product size and style.
Use the roller to measure your product and start noting the dimensions to cut it later accordingly.
Adding 1/16 inch clearance to those measurements is ideal when cutting your cardstock. This extra space will allow contents to slide in and out quickly.
Customization allows flexibility, but maintaining industry standards ensures product delivery and compatibility.
Step 2: Cutting the Card Stock
It’s time to cut the cardstock using the dimensions noted earlier. Then, Using a ruler and pencil, mark cutting lines. Now, carefully cut the cardstock along the drawn lines. With a craft knife or scissors, carefully cut out two separate pieces, the bottom and top.
To create a closing lid, you must cut the top piece 1/8 inch larger than the bottom on all sides.
Step 3: Create Lines
On the inside of each piece, determine where foldable lines must go.
For the bottom part, mark 1⁄4 inch in from the edges of the product dimensions, while for the top line, mark 1⁄4 inch in from the long edges and 5/8 inch in from the short edge.
After that, use a ruler and scoring tool to create precise indented fold lines. Finally, add tabs by marking partway across corners at an angle.
Step 4: Fold on the Lines
Firmly fold on each scoreline, Working surface by surface. Reinforce corners and tabs by pressing an object like a book against the inside of the folds. Preferable you have to create sharp 90-degree angles
Step 5: Glue Box Together
As we reach the desired boxes, apply liquid glue or tape to the bottom piece’s tabs. Firmly stick tabs to the corresponding interior sides of the top piece. Then, Align all edges neatly with no overhang. Use clamps or weights to hold it in place while the glue dries.
Step 6: Designing the Cardstock / Optional
Suppose you want a unique package that stands out. Then, it is possible with custom tuck box designs. It is important to choose the right design that represents your product and print it on the cardstock.
Consider following the theme, color scheme, and any unique features that will make your box stand out on the shelves as the best retail tuck box.
Add appealing illustrations and branding elements to give your users memorable first impressions. You want to become a show-stopper with these cute boxes.
If you don't have printers, Need not worry. The Customize Boxes has your back. With our robust printing technology, your boxes will truly shine.
Send us the design, or contact us to get a custom one now. We will print and ship cardstock with your designs in no time.
Wrap Up
As you understand how to make a tuck box, repeat the process multiple times to attain tailored homemade packaging for your businesses. They are one of the best in-house packaging solutions that provide a stylish and affordable way to showcase your content without breaking the bank.
When you fold a piece of paper into a box, you achieve motivation to work on your business further. So, why stop? Make handmade tuck boxes to build a brand recognized and adored by everyone.
Or you can get pre-made batch tuck packages at The Customize Boxes. Get in touch for a free quote and samples.